Environment:
ESXi 6.5.0
vCenter 6.5.0
VM: Windows Server 2016
Abstract:
Ever wonder why the second or third VMDK on your Windows
Virtual Machine (VM) is not appearing in file explore? It is there, barring a
mistake when creating the VM in vCenter. This post will show you how to make
the VMDK accessible and configurable in the Windows disk manager.
Assumptions:
This post assumes you know how to create a VM with multiple
hard drives.
Reference:
https://kb.vmware.com/s/article/2000767/
Steps:
1. Create a VM with multiple drives
2. Install Windows OS (Server 2016)
3. Log into the newly created VM
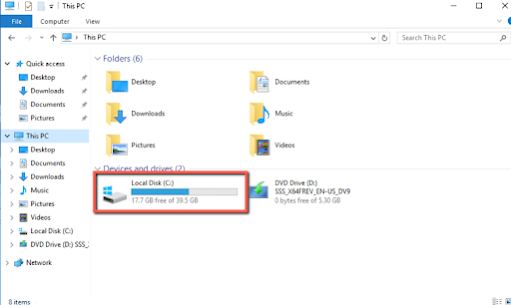
4. Navigate to PC settings in File Explorer
5. Observe, only one (1) drive is displayed
Validation:
1. In the taskbar click "Search" type "Run"
2. Type "diskmgmt.msc" in the dialog box

4. Right-click and see "New Simple Volume" is grayed out
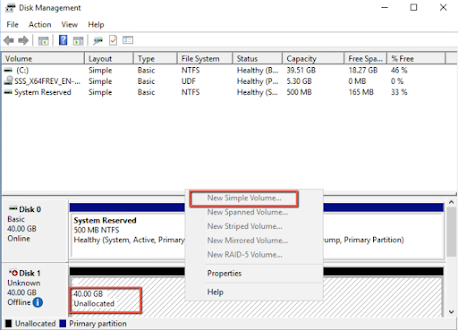
5. Right-Click unallocated space (disk 1)
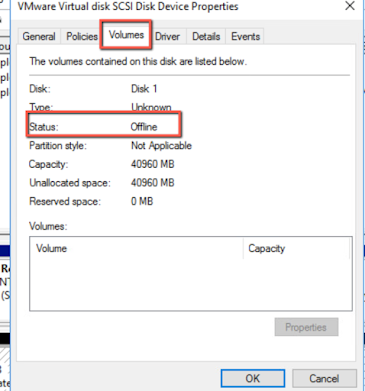
6. Go to properties
7. Select Volumes tab
8. Observe, status is "Offline"
Remediation:
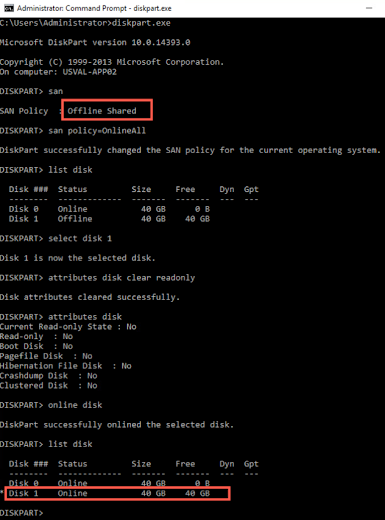
1. Bring up the CMD prompt
2. Follow commands from this VMware KB
2a. https://kb.vmware.com/s/article/2000767
3. Repeat steps 6-8 for multiple disks
4. Navigate back to Disk Management (Step 2)
5. Right-click on Disk1 "unknown"

6. Initialize Disk1 with MBR (Master Boot Record)
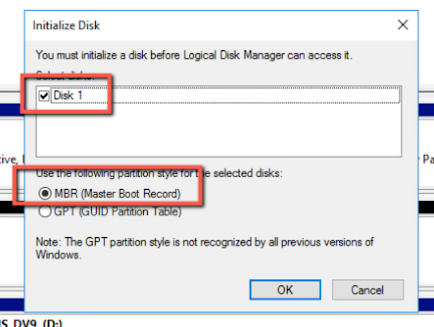
7. Click "Ok"
8. Right-click on "unallocated" space
9. Observe, "New Simple Volume" is now available
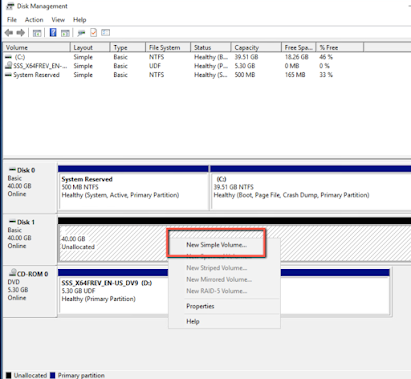
10. Select "New Simple Volume" follow the wizard
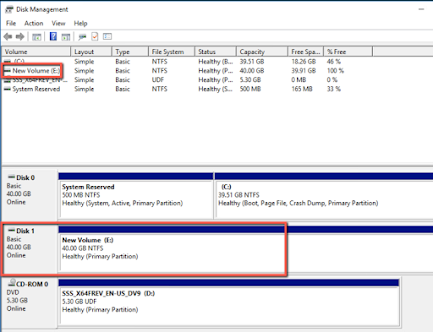
11. Select the defaults in the wizard
12. Observe, "New Volume" created
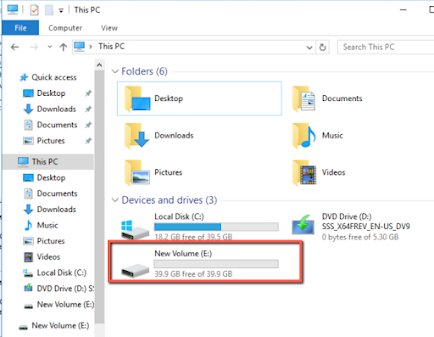
13. Navigate to "File Explorer"
14. Observe, the new drive
15. Repeat steps 5-11 for additional drives
16. Done